
The Modern Rooming Calendar
The Rooming Calendar will be your hub for Property Management as most of the lodge processes are governed from here. Navigate to the modern Rooming Calendar through Property > Rooming Calendar > Modern. If you work from the Rooming Calendar daily, you may want to set the Rooming calendar as your landing page.
Display features.
The Modern Rooming Calendar has a full-screen display. This makes for easy navigation and management of rooms.
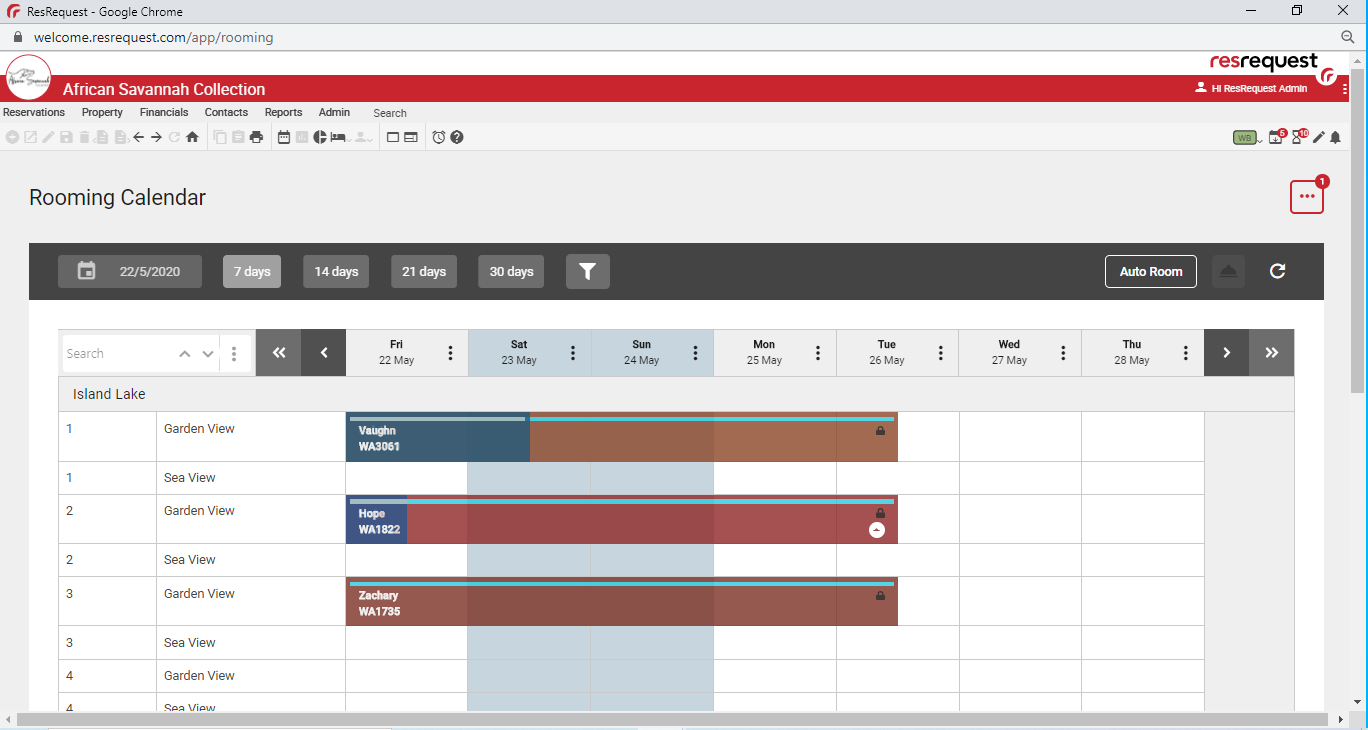
With the option to view in a 7 day, 14 day, 21 day or 30/31day overview.
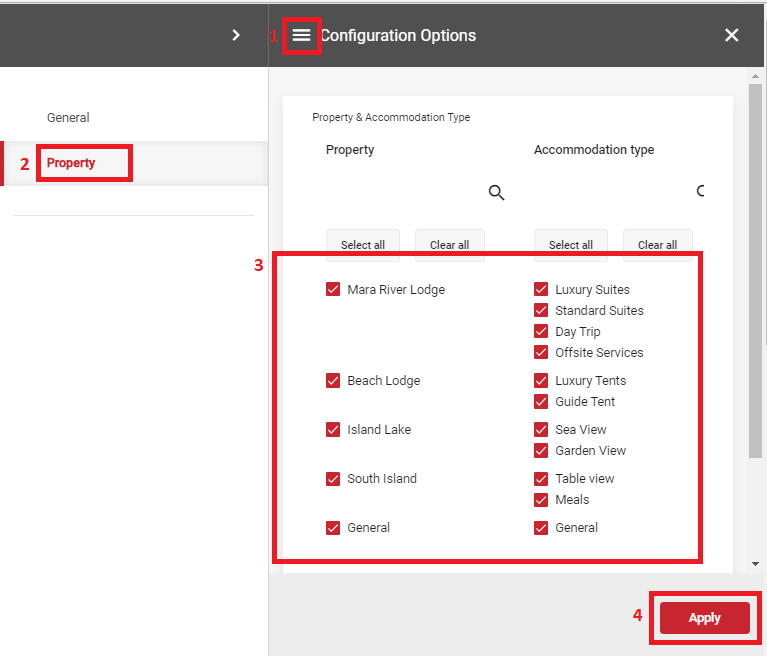
The user has the option to set property filters by clicking on the ‘hamburger’ menu options & selecting property.
Filters:
Filter options are available, by clicking on the filter button next to the calendar date display buttons. This gives the options needed to select what information the Rooming Calendar will display.

Once selected, the general configuration options will become available. This gives the user the option to display information by room number or accommodation type. The user can also select what reservation details they would like displayed, as well as the option to view rooming conflicts.
The user has the option to set property filters by clicking on the ‘hamburger’ menu options & selecting property.
Once property has been selected, the property configuration options will be displayed. This gives the user the option to select which properties and/or rooms they would like to display on the Rooming Calendar.
Rooming Calendar features:
Auto rooming is available on the Modern Rooming Calendar. This allows the user to room all the unallocated reservations at the click of a button.
If you would like to save the automatically roomed reservations, you would simply click on ‘save’. If you wish to undo the automatically roomed reservations, you would need to select the undo button BEFORE selecting save.
All unallocated reservations will be shown at the bottom of the Rooming Calendar, where they will remain until they have been roomed.
Manage reservations:
Reservations can be managed from the Rooming Calendar by selecting a reservation, either an unallocated reservation or for a reservation that has already been roomed, and click on the ‘Bell’ icon.

Once the user has clicked on the ‘Bell’ this will bring through the reservation management options.
Reservation Details
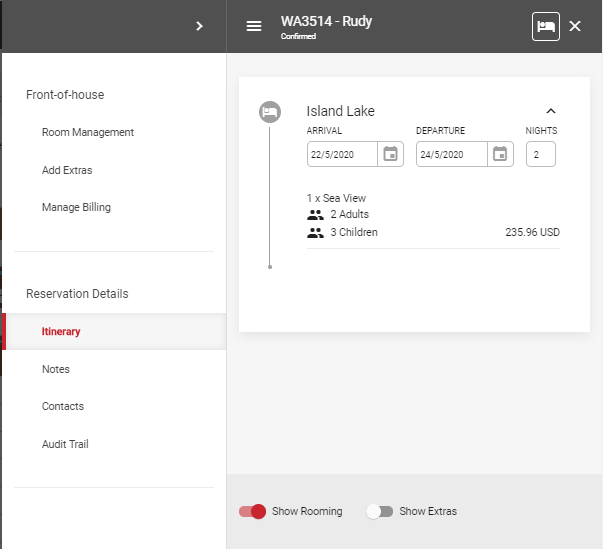
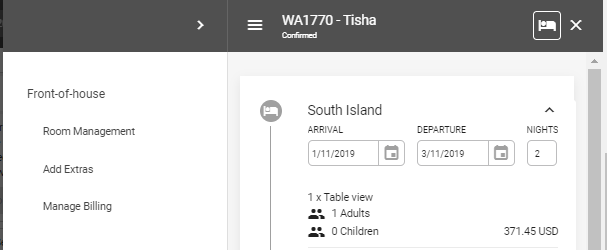
The information that will be brought forward first is the itinerary details of the reservation, which is related to the reservation details portion of the reservation management.
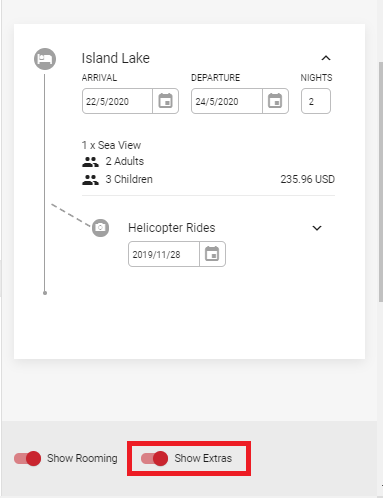
Select the Extras toggle to view what Extras have been booked.
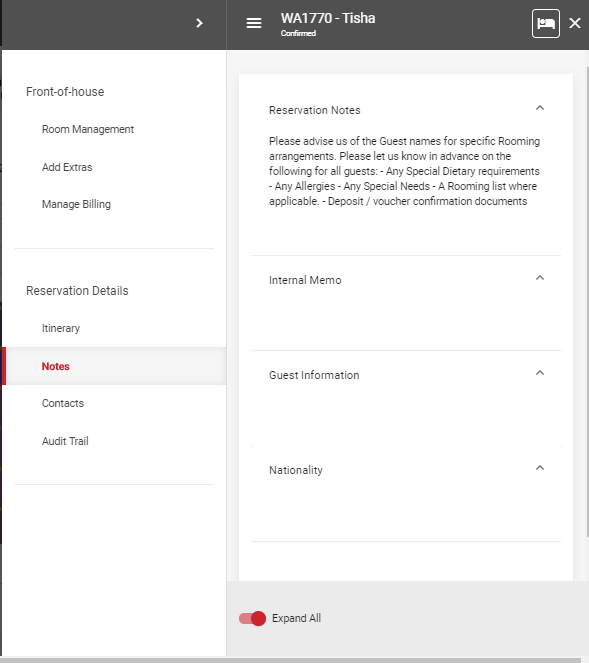
Select “Notes” to view the reservation notes, internal memos, guest information & nationality.
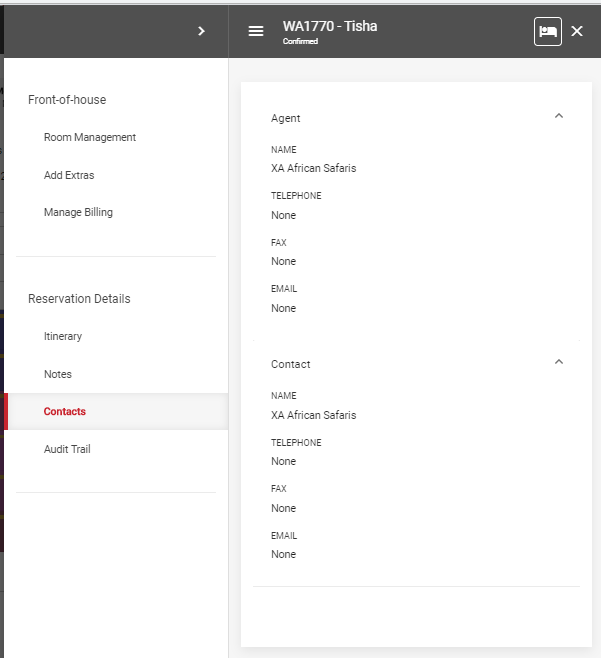
Select “Contacts” to view contact information linked to the reservation, such as the agent contact details and direct contact details.
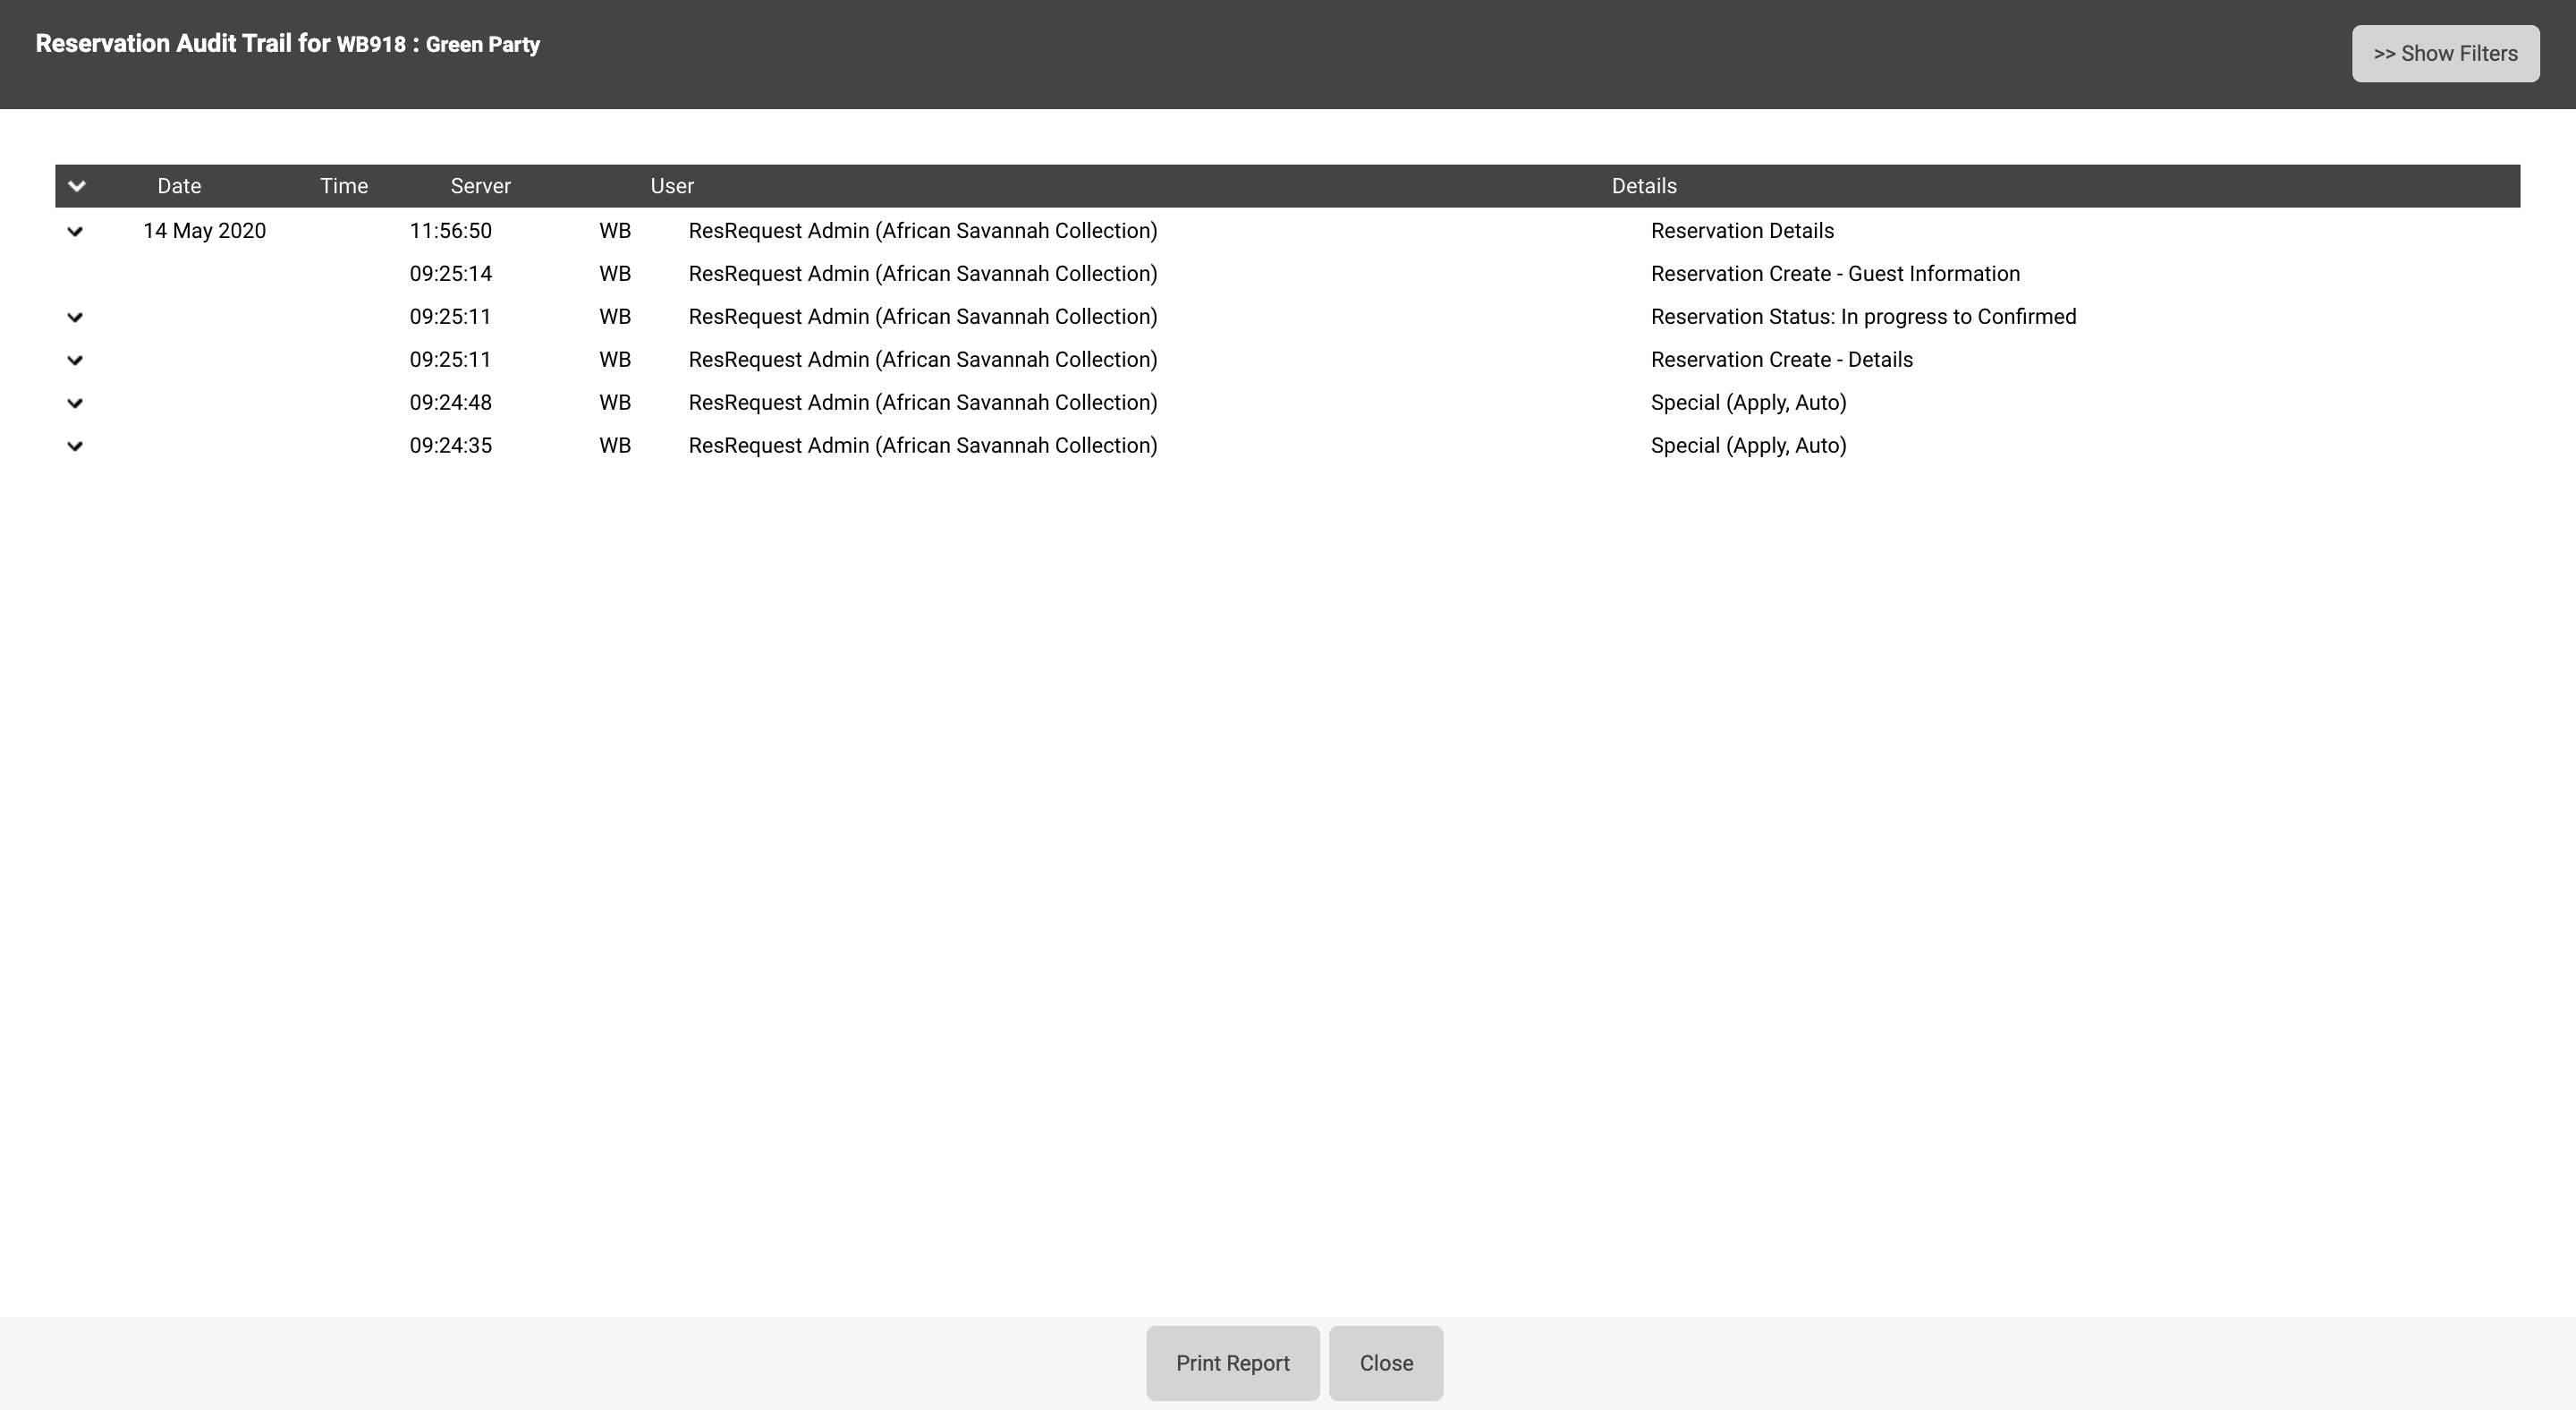
The Audit Trail of the reservation can be viewed by clicking on ‘Audit trail’, and a pop-up screen will appear with the reservation audit trail details.
Front- of- house:
Users can easily manage the front of house functions, such as billing, add extras to the reservation as well as the reservation room management.
Room Management allows users to manage the guest details and rooming of the reservation.
- Manage Guests – Add guest names and information for guest profiling and trip history.
- Change Rooms – Reservation can be roomed from here and/or upgraded.
- If a specific room has been requested, or the guests have already been checked in to their room, a lock will appear at the right hand side of the booking in the calendar
- Add extras like activities or bar purchases.
Manage Billing – View the financial information of the reservation: easily see outstanding payments, open and print the folio or invoice, record payments, generate invoices, create new folios and move charges to different folios from here.
The reservation is accessed directly by clicking on the reservation icon. This would be required if there are changes to the reservation, such as a change in the arrival date, for example.
If a user makes reservation changes and wants to refresh the Calendar, they can click on the Refresh icon, which will then refresh the Rooming Calendar to the filter options the user has selected.
Rooming Conflicts:
A rooming conflict occurs when two reservations, scheduled to be checked in over the same dates, have been assigned to the same room.
Users will see a system-generated message letting them know there are rooming conflicts that need to be manually resolved.

The user can go to each reservation causing the conflicts by clicking on the arrow for ‘Items in conflict’.

Reservations causing the conflict will be indicated by a red box around the reservation in the Rooming Calendar.

Rooming conflicts can also be seen by clicking on the ‘meatballs menu’ and selecting rooming conflict.
The system generated message will appear letting the user know there are rooming conflicts.
Click, Drag and Drop:
Users can select a reservation item and move them between rooms by simply dragging and dropping the item into the relevant available room. Clicking on a reservation item also highlights the valid rooming possibilities in green.
Reports:
Within the Rooming Calendar, there are multiple day reports the user is able to pull to help with the daily logistics and planning at the Property.
The reports can be found by clicking on the ‘Kebab’ menu, where a list of reports will be available for selection.
Day Sheet
Here you can see the breakdown of the Pax Analysis, Reservation Summary, Rooming Plan, Request and Extras for that day. This report may be used to track transfers.
PAX Report
Here you can see a breakdown of how many guests are arriving, departing or in-house for that specific day.
Extras Report
Here you can see all Extras booked for that day. This report may be used to track transfers.
Arrival Folios Report
This report lists all folios of guests arriving that day.
Departure Folios Report
This report lists all folios of guests departing that day.
Legend:
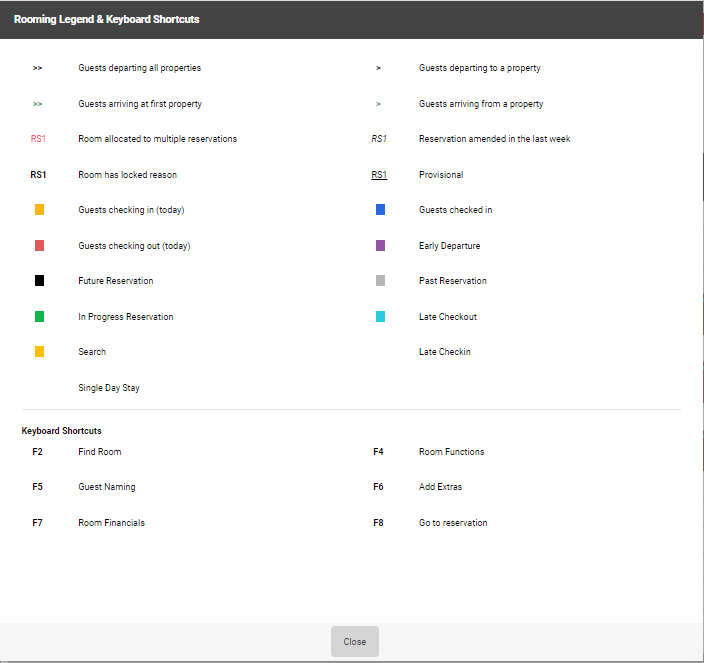
See what the different colours and symbols represent by looking at the legend. The legend can be found by clicking on the ‘Meatball’ menu and selecting Legend.
A pop- up screen will be generated with the rooming legend & keyboard shortcuts.
Modern Rooming Calendar Check-out Dates
Sometimes you need to change the date your guest checked out. This can be easily done from the rooming calendar.
To this navigate to the booking you would like checked out > Room management > Select the room you would like to check out.
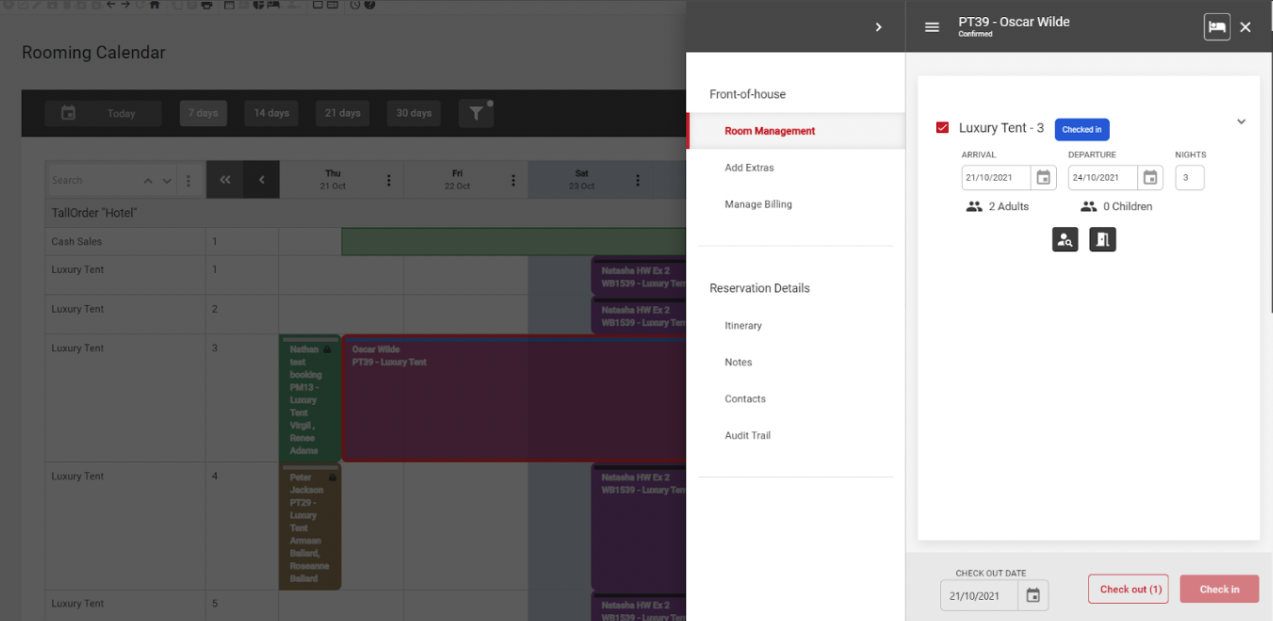
Once you are in the room you’d like to check out you will notice that there is a date on the bottom left-hand corner of the page. Selecting this date will allow you to change the date of check-out.
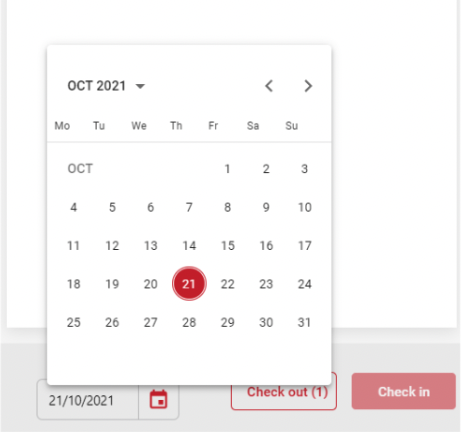
Once you have confirmed which date you would like the guest to be checked out on you can then go ahead and select the check-out button.
Note: You will need to correct user access to be able to perform this. If you do not see the check out dates please contact your system administrator.
Keep up to date with us
Menu
Visit our website
ResRequest Modules
- Business Intelligence
- Central Reservations
- Channel Management
- Customer Relationship Management
- Developer
- Email Series 2022
- Email Series 2023
- Financial Management
- Marketing tools
- Payment Gateways
- Point of sale
- Product
- Professional Services
- Property Management
- ResConnect
- ResInsite
- ResNova
- System Setup
- Technical Alerts
- Technical Tips
- Telephone Management
- Webinars Index
